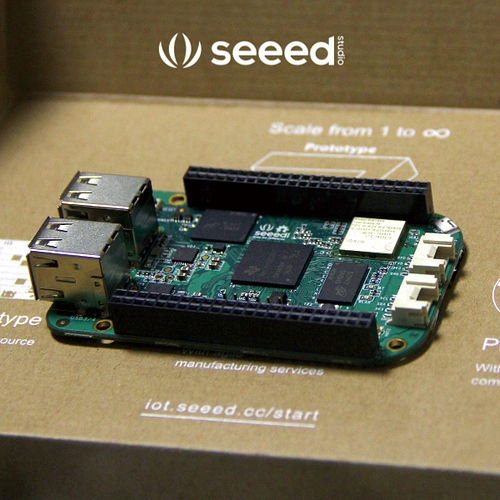
SeeedStudio BeagleBone Green Wireless(SeeedStudio BBG Wireless) is a joint effort by BeagleBoard.org and Seeed Studio. The BBG Wireless has included two Grove connectors and support mraa library, making it easier to connect to the large family of Grove sensors. The on-board HDMI is removed to make room for these Grove connectors and add a wireless chip on the board, it supports WiFi and Bluetooth.
In this project, I use a Grove Base Cape for BeagleBone for using other Grove modules such as Grove - Air Quality sensor to monitor the air quality in your house and Grove – Temperature Sensor to sense the temperature as well as a Grove – Relay to control your table lamp or something else.
We can view the sensor value from the web, and the web server is running on Beaglebone Green Wireless, so until now the web is only can be accessed in local area network.
Well, let’s get started with the journey of making.
STEP1:HARDWARE WORK
In this part, we need to make an acrylic box as the picture below shows, this work is by my workmate Nosk, and he is an intelligent industry designer, you can download the drawings by click here.
://github.com/Lee-Kevin/19.HomeControlCenterBBGW/tree/master/Drawings
Then we need to cut the the board using laser cutting. I guess you don’t have a laser cutting at home, you can find some in the hacker space near from you easily. If there’s no hacker space nearby, you can try the Laser Cutting Service supply by Seeed.
STEP2: WIRING
I connect a Grove - Relay to GPIO_51, a Grove – Air quality sensor to A2 port and a Grove – Temperature sensor to A0 port on the Grove Base Cape for Beaglebone Cape.
STEP3: CONNECT TO YOUR BEAGLEBONE GREEN WIRELESS
First, we need to configure your BBGW connect to the internet. It’s very easy to do that by smart phone, you just need to connect to BBGW AP named “BeagleBonexxxx” using mobile phone as the picture below shows.
Then your mobile phone will open the login page automatically. Just select the SSID near you and input the password as shown in the picture below.
At last, The BBGW will show as below and get the local network IP, we can access the Beaglebone Green Wireless using the network IP via SSH. Now, the board is connect to the Internet and next we need to do some software network.
STEP4: SOFTWARE WORK
Since the software code is a little complex, I’ll show you the major technology point in this part, I run a web server on Beaglebone Green Wireless to manage the Grove Modules, view the Grove Sensor Values and using a Grove – Realy to control a table lamp or something else.
Step1:Install Flask
I use a flask web framework for this APP, Flask is a lightweight Python web framework based on Werkzeug, Jinja 2 and good intentions.
You can install it by executing following command.
pip install flask
Step2: Install Flask-Socketio
Flask-SocketIO gives Flask applications access to low latency bi-directional communications between the clients and the server. The client-side application can use any of the SocketIO official clients libraries in Javascript, C , Java and Swift, or any compatible client to establish a permanent connection to the server.
In this project, we need flask-socketio so that the server can update the sensor data to the client as well as the client can tell the server to open or close the Grove – Relay.
Install it by following command.
pip install flask-socketio
Step3: Install Gevent
The flask-socketio package relies on asynchronous services, in this project, I select gevent.
gevent is the framework used in previous releases of this extension. The long-polling transport is fully supported. To add support for WebSocket, the gevent-websocket package must be installed as well. The use of gevent and gevent-websocket is a performant option.
Install it by following command. This step may takes you about 10 minutes
pip install gevent
Step4: Download the code
Now, we have already install the requirements, download the code from github.
git clone ://github.com/Lee-Kevin/19.HomeControlCenterBBGW
Step5: Run the code
Navigate to the project directory 19.HomeControlCenterBBGW/Code and run the demo code
python runserver.py
STEP5: THE RESULT
Open your web browser and input the Beaglebone Green Wireless local IP and the port is 8000, and you’ll see the web page as picture below shows.
This’s the home page, we can see the sensor data and control the Grove – Relay.
Join the Idea contest here and win a FREE beaglebone wireless for yourself !

